 I used to love my apartment. Great location, reasonable rent, solid layout. Then my upstairs neighbor got a subwoofer. And a girlfriend who apparently wore heels indoors at midnight. Within two weeks, I was sleeping with earplugs and losing my mind. So I did what any desperate person does. I went straight to Amazon and started throwing money at the problem.
My first purchase was a 12-pack of those egg-crate foam panels. You know the ones. They come in black or charcoal gray, cost about $25, and promise “professional studio quality.” I stuck them on my bedroom wall with command strips, stood back, and waited for silence.

Nothing changed. Not even a little. The bass still rattled through the ceiling. The hallway noise still crept in under my door. It was incredibly frustrating. I later learned that the acoustic panels NYC residents search for most often are a completely different product category. And that makes sense. Living in a dense urban environment means you’re dealing with layered noise from every direction. Cheap foam squares were never going to cut it.
That experience taught me something valuable. Before you spend a single dollar on soundproofing, you need to understand what kind of noise you’re fighting and what each product actually does. Most people skip this step. I sure did. And it cost me time, money, and way too many sleepless nights.
Mistake #1 — Confusing Soundproofing With Sound Absorption
This is the big one. Soundproofing and sound absorption are not the same thing. They solve completely different problems.
Soundproofing blocks noise from entering or leaving a room. Think mass, density, sealed gaps. We’re talking about heavy drywall, mass-loaded vinyl, decoupled wall assemblies. Serious structural stuff.
Sound absorption reduces echo and reverberation inside a room. That’s where acoustic panels come in. They soak up reflections so your space doesn’t sound like a tile bathroom. Panels make a room sound better on the inside. They don’t stop your neighbor’s TV from bleeding through the wall.
Here’s where it gets tricky. Most apartments need both. You need to block the outside noise AND tame the acoustics inside. Panels alone won’t give you peace and quiet. But paired with real soundproofing measures, they make a massive difference in how comfortable your space feels.
Mistake #2 — Buying the Cheapest Panels Available
I get it. Nobody wants to overspend. But that $20 foam pack is genuinely useless for anything beyond decorating a YouTube backdrop.
Thin foam panels, usually around half an inch thick, absorb almost nothing below mid-range frequencies. They’ll catch some high-end flutter echo. That’s about it. If you’re dealing with traffic rumble, bass from next door, or HVAC hum, they won’t even register.
What you should look for instead: panels that are at least two inches thick with an NRC rating of 0.8 or higher. NRC stands for Noise Reduction Coefficient. It tells you how much sound a material absorbs on a scale from 0 to 1. Fiberglass and mineral wool panels consistently outperform foam at every frequency. They cost more upfront. But you buy them once, and they actually work. The cheap foam? You’ll rip it down in a month and start over anyway.
Mistake #3 — Putting Panels in the Wrong Places
Most people do exactly what I did. They cover the wall facing them. The big empty one behind the desk or across from the couch. It feels logical. It looks cool. And it accomplishes almost nothing.
Sound doesn’t just travel in a straight line and stop. It bounces. It reflects off hard surfaces, builds up in corners, and sneaks around furniture in ways you wouldn’t expect. Slapping panels on a random wall is like putting a Band-Aid on your elbow when your knee is bleeding.
The spots that actually matter are called first reflection points. Stand where you normally sit. Have someone slide a mirror along the wall. Any spot where you can see a speaker, a window, or a door in that mirror is a first reflection point. That’s where panels do real work. Corners are the next priority. Low frequencies love to pile up there, so bass traps in the corners of your room will do more than a dozen flat panels on open walls.
And don’t forget the ceiling. I know, nobody wants to deal with the ceiling. But if your main noise source is footsteps from above, treating that surface is not optional. Even a few strategically placed panels overhead can noticeably reduce the harshness of impact noise bouncing around your room.
Mistake #4 — Ignoring Doors, Windows and Gaps
This one drove me crazy once I figured it out. I had decent panels on the walls. I’d sealed the obvious stuff. The room sounded better. But I could still hear the hallway like I was standing in it.
The problem was my front door. There was a quarter-inch gap along the bottom. Sound was pouring through it like water through a crack in a dam. I added a door sweep, put weatherstripping around the frame, and the difference was immediate. Shockingly so.
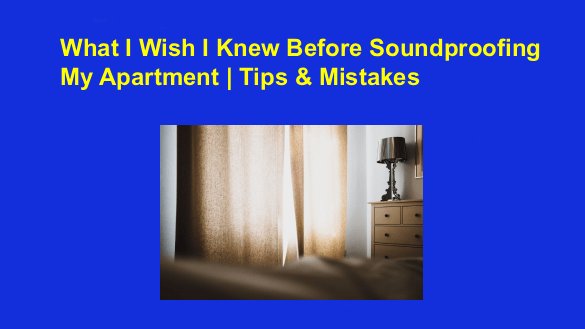
Windows are another weak spot. Single-pane glass barely slows sound down. If replacing them isn’t an option, heavy blackout curtains help more than you’d think. Acoustic window inserts are even better. They create an air gap between the insert and the existing glass, and that dead air space is surprisingly effective at blocking street noise.
The lesson here is simple. Your room is only as quiet as its weakest link. You can spend hundreds on premium wall panels, but if sound is leaking through gaps and thin glass, you’re fighting a losing battle. Seal everything first. Then add panels. The order matters more than most people realize.
What Actually Worked in the End
After all the trial and error, here’s what finally gave me a quiet apartment.
I started with the gaps. Door sweeps, weatherstripping, and acoustic caulk around every baseboard and outlet cover on shared walls. The total cost was under $60, and it took a Saturday afternoon. Then I added window inserts on the two street-facing windows. That ran about $400 but eliminated maybe 70% of the outside traffic noise.
Next came the panels. Six two-inch mineral wool panels at first reflection points and two bass traps in the bedroom corners. I mounted them with impaling clips so my landlord wouldn’t lose his mind. The room went from echoey and harsh to calm and controlled. Finally, I put a thick area rug with a heavy pad over the hardwood in the bedroom. Small detail, big impact.
The whole project cost me around $900 over two months. Not cheap. But compare that to moving, breaking a lease, or buying noise-canceling headphones you’ll wear twelve hours a day. It was worth every penny.
If you want to skip the months of research and bad purchases I went through, Sound Pro Solutions is worth checking out. They specialize in helping apartment dwellers find the right acoustic treatments for their specific noise problems. Whether you need panels, insulation guidance, or a full room assessment, their team can point you in the right direction before you waste money on stuff that won’t work.