Note: The links in this post are affiliate links.
Question from Roger G.: Hi Rick. I recently ordered a new desktop computer that has a 350 watt power supply in it.
I bought a new video card for it, but when I went to install it the instructions said the computer’s power supply needs to be able to put out at least 550 watts.
I checked online and there are several different kinds of power supplies to choose from and I don’t know exactly what kind I need to buy.
I called the company that sold me the computer and asked what kind of power supply is inside it. They told me it’s a standard ATX-type power supply.
My questions:
1 – Can I replace this computer’s existing power supply with a larger one without burning up anything with the excess power?
2 – If so, can you recommend one?
3 – Can you give me a rough outline of the process required to physically swap out the power supplies?
Rick’s answer: Yes Roger, replacing a computer’s Power Supply Unit (aka PSU) with a larger one (in terms of wattage) is just fine.
The “extra wattage” won’t come into play because the PC will only draw the amount of wattage that it needs in order to operate. Replacing a PSU with one that supplies a lower wattage is never a good idea however.
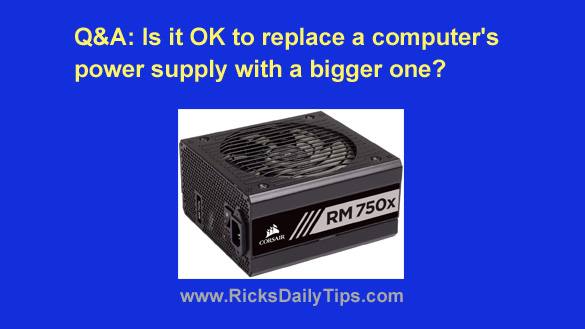
As far as choosing a replacement PSU is concerned, I believe this one from Corsair would be a great option.
It’s a 750 watt ATX power supply (which is plenty for your needs). What’s more, it’s a big seller on Amazon thanks to its great ratings and thousands of positive user reviews.
And finally, you shouldn’t find replacing the PSU all that difficult. Here’s how:
First, read and agree to Rick’s semi-standard disclaimer:
“Any time you remove or install a piece of computer hardware, there’s always a chance that something could go wrong. Therefore, I recommend that you hire a professional to make these changes for you if you don’t feel reasonably sure that you can safely make them yourself. Again, if you decide to proceed, you do so at your own risk.
By choosing to follow the instructions below, you agree that should the sun start shining at night, your cat starts howling at the moon, or smoke fills the room and your PC turns into a flaming pile of silicon after replacing its power supply, it won’t be the fault of your humble tech blogger. In other words, you proceed at your own risk. (Notice a recurring theme here?)“
If you agree with everything I said in the semi-standard disclosure above, then feel free to proceed…
1 – Unplug the computer’s power cord from both the electrical outlet and the back of the PC, then unplug the monitor, keyboard and all other peripherals from the computer.
2 – Press and hold the PC’s power button for 20 seconds to help drain any stored energy from the PC’s capacitors.
3 – Open up the case and take several high-quality photos of the various power supply leads and connections to the motherboard and other components. These photos will serve as guides when it comes time to connect the wires from the new PSU.
4 – Unplug all the power connectors until there is absolutely nothing connected to the PSU.
5 – Remove the screws holding the PSU in place, then gently lift the PSU out of the case.
6 – Mount the new PSU in place of the old one and re-install the screws.
7 – Using the documentation that came with the power supply (and while referring to previously mentioned photos), carefully connect the power supply leads to the motherboard, disk drives and other components.
8 – Double-check your work to make you you haven’t missed a connection.
9 – Once you’re sure you have the new PSU properly installed and connected, replace the case cover that you removed in step 3.
10 – Reconnect the power cord, monitor and other peripherals.
11 – Turn the computer on, boot it up into Windows, then make sure everything works as it should.
If you’re like me and you prefer watching a video instead of following written instructions, here’s a short video showing the general procedure for replacing a computer power supply. Check it out!
There you go Roger. Good luck!
Never miss a tip! Click here to sign up for my free Daily Tech Tips Email Newsletter!
