 A friend of mine drives the Tauranga to Auckland motorway three times a week. Last month he counted 14 fresh stone chips across his bonnet and bumper after one run behind a loaded truck.
The respray quote was over NZ$900 for the bumper alone.
New Zealand roads are hard on paint, and our summer UV Index regularly hits 12 or higher, which is classed as extreme. That combo speeds up fading, oxidation, and chip damage.
Protection costs less than repeated repairs, and it helps your car look cared for when you sell it.
You’ll know what film and coatings actually do, what you’ll typically pay in NZD, and how to look after the finish without guesswork.
Quick Takeaways
Match the protection to your driving, then choose an installer who can show their process and warranty in writing.
- PPF is a thick physical barrier. At roughly 200 microns, paint protection film can self-heal light marks and absorb stone hits on high-impact zones.
- Ceramic coating boosts your clear coat. At about 1 to 2 microns per layer, it improves UV and chemical resistance, but it will not stop a stone chip.
- NZ pricing is fairly consistent. Partial-front PPF often starts around NZ$800, full-front is commonly NZ$2,500 to NZ$4,000, and full-car coverage can run NZ$6,000 to NZ$8,000.
- The installer matters more than the product. Clean prep, controlled lighting, and a real warranty drive most of your long-term result.
- Maintenance stays simple. Use pH-neutral shampoo, skip tunnel brushes, and book an annual check on film edges and high-wear areas.
What Paint Protection Really Means
Your clear coat is thin, so a sacrificial top layer takes the abuse first, instead of your paint taking the hit.
Every factory paint job has a clear coat on top. Road grit, salt air, UV radiation, and bird droppings attack that layer every week.
Paint Protection Film (PPF)
PPF is a transparent urethane film around 200 microns (about 8 mil) thick. It’s built to take impacts that would otherwise chip your clear coat.
Most premium films have self-healing top coats, so light swirls fade with heat from the sun or warm water. Many also add hydrophobic behavior, meaning water beads and sheets off more easily.
Ceramic Coating
Ceramic coatings are thin layers of SiO2, which is silicon dioxide, that bond to your clear coat. They add chemical resistance, UV resistance, and strong water beading.
Applied properly, a quality system can last years, but it’s not a shield against rock strikes. Think of it as making the surface harder to stain and easier to wash.
Sealants and Waxes
Waxes and synthetic sealants are the short-term, DIY-friendly options. They improve gloss and add light protection, but they need frequent reapplication.
| Feature | PPF | Ceramic Coating | Wax/Sealant
|
|---|---|---|---|
| Thickness | ~200 microns | 1 to 2 microns | Sub-micron |
| Chip protection | Yes | No | No |
| UV/chemical resistance | Good | Excellent | Mild |
| Durability | Up to 10 years | 2 to 5+ years | Weeks to months |
| Starting NZD | ~$800 partial | ~$500 single layer | ~$30 DIY |
Three Reasons It’s Worth Doing
If you drive highways, park outside, or live near the coast, protection stops small damage from turning into expensive paintwork later.
Stronger Defense Against Chips and Scuffs
PPF on the bumper, bonnet, and mirrors absorbs impacts that would otherwise crack the clear coat. If you commute behind trucks, it’s one of the few options that truly reduces chip damage.
A full-front install in the NZ$2,500 to NZ$4,000 range can offset multiple repairs over a few years, especially if you’re picky about a clean front end.
Better UV and Chemical Resistance
When the UV Index peaks around 12 and can climb higher in the far north, clear coat takes a beating. A ceramic-coated surface slows the dulling and chalky look that comes from oxidation.
It also helps against chemical stains from bug splatter, bird droppings, and tree sap, as long as you still wash and remove contaminants promptly.
Easier Washing and Stronger Resale Signals
Protected panels release grime faster, so you spend less time scrubbing. That usually means fewer wash-induced swirls and fewer paid paint-correction visits.
At resale or trade-in, a tidy finish reads as “looked after,” even if the kilometers are high.
Choosing Coverage That Matches Your Driving
The smartest package is the one that covers your highest-risk areas, not the one with the fanciest marketing name.
Use your weekly routine as the deciding factor, because where you drive and where you park matters more than the badge on the bonnet.
- Daily motorway commuter: Film on the front bumper, bonnet, mirrors, and headlights. Add a coating over it if you want faster, easier washing.
- Parked outside in coastal air: A full-body coating for UV and salt exposure, plus film on leading edges.
- Gravel roads, utes, and 4x4s: Extend film to sills, rear arches, and lower doors where grit blasts upward.
- New EV with softer paint: Full-front film, then a coating over the remaining panels to cut down cleaning time.
- Leased or tight budget: A coating only, paired with consistent hand washing and quick clean-up of bird mess. If you’re keeping a close eye on all your motoring costs, it’s also worth using a tool like GasBuddy to find the cheapest fuel on your regular route. Small savings add up when you’re commuting regularly.
Typical Pricing
Expect pricing to move with vehicle size, paint condition, and how much prep work is included.
Film coverage: Partial front is often NZ$800 to NZ$2,500. Full front commonly lands between NZ$2,500 and NZ$4,000. Full car coverage is typically NZ$6,000 to NZ$8,000.
Coating packages: Entry-level, single-layer options may start in the mid-hundreds NZD. Multi-layer professional systems, especially with paint correction, can reach the low thousands.
Repair benchmarks to sanity-check the spend: A bumper respray is often NZ$300 to NZ$600, a full panel can be NZ$500 to NZ$1,200, and a full repaint can run NZ$2,000 to NZ$5,000 or more. If you drive on highways weekly, protection can pay back by avoiding repeat front-end repairs.
How To Vet an Installer Properly
Even the best material looks average if the prep, fit, and finishing work aren’t nailed
- Ask for the exact brand and product line being installed, plus the written warranty terms.
- Look for recognized training or accreditation, and ask to see close-up photos of edges, badges, and tight curves.
- Check that the workshop has strong lighting and dust control, because contamination shows up forever under film.
- Confirm what prep is included, especially decontamination and machine polishing where needed.
- Watch for red flags like “lifetime” promises with no paperwork, vague product names, or no aftercare instructions.
- Get documentation, including an itemized invoice, coverage diagram, and warranty registration details.
Where to Get It Installed
Once you’ve settled on coverage, a straightforward local shop with clear documentation makes the whole process easier, from booking through to aftercare.
Once you’ve narrowed down film coverage and budget, the final decision is usually about trust. Look for a shop that can explain their prep steps, show clean edge work on real cars, and put warranty terms in writing. If you’re based in Auckland, you can start by checking vehicle paint protection services and asking what a full-front package includes for motorway commuting.
Care and Maintenance That Actually Works
Good aftercare is mostly about gentle washing and quick removal of contaminants, not expensive products.
- First week after coating: Don’t wash the car, and keep it out of sprinklers where possible. Follow your installer’s cure window.
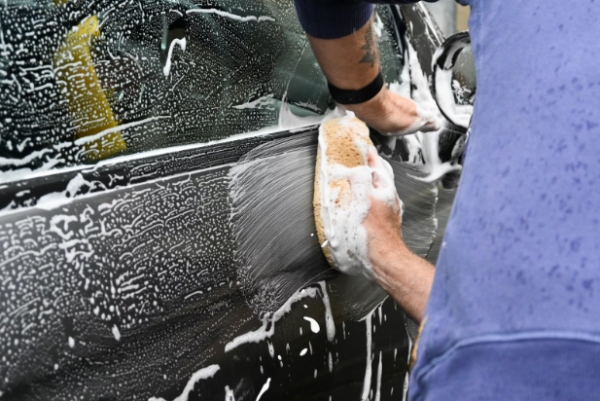
- Routine washing: Hand-wash every one to two weeks with pH-neutral shampoo and the two-bucket method. Dry with clean microfiber towels or a blower.
- What to avoid: Brush-style tunnel washes, harsh solvents, and blasting high-pressure water directly at film edges.
- Decontamination schedule: Every few months, use an iron remover if brake dust is building up. Light claying is fine when needed, but use lubrication and a gentle touch.
- Annual check: Book a yearly inspection so edges, seams, and high-wear zones get repaired before dirt starts lifting them.
Common Myths That Cost People Money
Ignore the hype and you’ll avoid buying the wrong product for the wrong problem.
“9H means scratch-proof.” 9H refers to a pencil hardness test, not real-world scratch resistance. Poor washing still creates swirls.
“A coating stops stone chips.” At 1 to 2 microns thick, coatings can’t absorb a rock impact. If chips are your main issue, you need film on the front end.
“Film is maintenance-free.” Film holds up well, but it can still be marred by dirty wash mitts or aggressive drying.
“All films are identical.” Thickness, top-coat chemistry, self-healing performance, and warranty coverage vary by brand and model.
Make Your Protection Plan Fit Your Real Life
Start with your biggest risk: stone chips on the front, UV and contaminants everywhere else.
Then spend your energy where it counts, which is a proven installer, clear paperwork, and a washing routine you’ll actually stick to.
If you review the finish at six to twelve months, you’ll quickly see whether you’re avoiding repair bills and keeping the car looking sharp.
FAQs
These are the questions people ask right before they book, especially after they’ve priced up repainting.
Do I need both film and a coating?
It depends on your risk. Film is the main defense against chips on impact zones, while a coating helps across the whole car with UV, chemicals, and easier washing.
How long does each option last?
Quality film commonly comes with warranties up to about 10 years. Coatings range from a couple of years to longer, depending on the system, prep, and maintenance.
Can I still use automatic car washes?
Skip brush-style washes. Touchless rinses are less risky, but hand washing is the safest way to reduce swirls and protect film edges.
What’s the best value approach on a tight budget?
Protect the highest-hit area first, usually the front bumper and mirrors, then choose a coating if you want easier cleaning. Your wash routine will make or break the result.