 Want to get my easy to follow Tech Tips in your email?
Sign up for my daily Rick’s Tech Tips Newsletter!
Note: The links in this post are affiliate links.
I used either Photoshop or Photoshop Elements as my go-to image editing app for many years, and I’ll admit they are amazingly powerful. But I eventually realized there are two major drawbacks to using them:
1 – As you can see right here, they are expensive.
2 – You can only install one licensed copy on two computers at one time.
There really isn’t anything you can do about #1. Neither edition of Photoshop is cheap, and that’s just the way it is.
You can somewhat mitigate #2 by deactivating the app on one of the two machines it’s installed on before installing it on a new machine, but if you forget to complete that all-important deactivation step (or if a dead PC prevents you from doing so) then it’s a real hassle getting Adobe to let you install it on the new machine. I learned that the hard way.
After I ran into this issue the second time I decided to look around for an acceptable alternative to Adobe’s image editing products.
I have always used GIMP on my Linux machines and I’ve been happy with it for the most part. But when I decided to ditch the Photoshop apps on my Windows PCs I really wanted to find something that looks and works a lot more like Photoshop. And I found it in a fantastic free app called PhotoPea.
Like GIMP, Photopea is completely free to use on as many machines as you want to install it on. And also like GIMP, it has all the features and functionality that I really need in an image editor.
But what I really like about Photopea is its Photoshop-like user interface. Once you open the actual app to edit (or create) an image what you see looks and works a LOT like Photoshop and Photoshop Elements. There are a few differences (primarily in the menus), but if you’re familiar with the Adobe apps you’ll feel right at home with Photopea.
Here’s a screenshot showing Photopea in action:
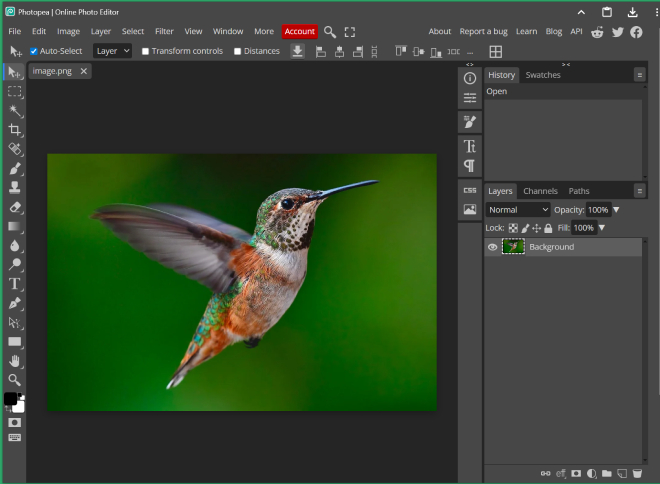
Pretty cool for a free alternative to Photoshop, right?
To get started simply visit photopea.com and read the info on the welcome screen. When you’re ready to get down to business just click one of the Start using Photopea buttons.
You’ll have two options for using Photopea to create or edit your images:
1 – Simply use the online version of the app in your browser, avoiding the need to download anything to your computer.
2 – Click the Install Photopea button to install the light-weight app on your machine.
Photopea works like a charm either way, but I prefer running it locally for the sake of speed and convenience.
Regardless of how you choose to use Photopea, the result will be an exceptional image editing experience that is very close to the one are used to with Photoshop.
As I mentioned above, Photopea is completely free to use. The app does display one unobtrusive ad in the right-hand column, but you can remove that ad if you so choose by signing up for an inexpensive Premium license for the app.
The ad doesn’t bother me personally so I plan to stick with the free version. If you simply can’t abide seeing the ad over on the right, just click the Account button at the top of the app to sign up for Premium.
Bottom line: Although Photopea doesn’t have all the bells and whistles found in Photoshop and Photoshop Elements, it has everything I need in order to create and edit images to my liking. And since the user interface is so much like Photoshop’s I found the learning curve to be virtually nil.
Bonus tip: Once you have a collection of awesome photographs you can proudly display them as a slideshow on one of these.