 There are travel adventures ahead — really — and that’s what getting a passport for your baby signifies. But first, you’ll need one thing that seems to stress even the most relaxed parents: a compliant passport photo.
The good news? There’s no need to book a studio session or make an appointment at the drugstore, especially not with a fussy baby in tow.
Taking a baby passport photo at home is totally feasible — and thousands of parents do it successfully every year armed with little more than a smartphone and a white sheet. 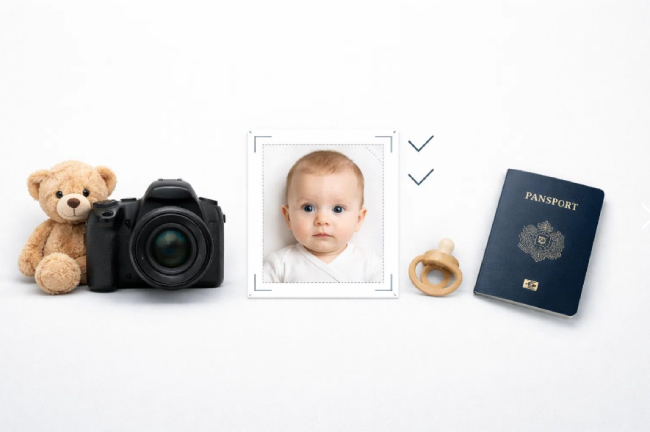
This guide will take you through the entire process, including how to prepare your background and print a photo that complies with the official U.S. State Department requirements. Follow these instructions, and you will have a photo that is ready for submission without the anxiety.
What You’ll Need
Rally up these items before you begin. Most are already present in your home — nothing exotic needed.
- A smartphone with a decent camera — any iPhone or Android from the past four years should work
- A white or cream-colored sheet, blanket, or cloth (for the backdrop)
- A room with plenty of natural light — preferably one with a big window
- A white piece of foam core or cardboard (optional, but can help minimize shadows)
- Another adult to help keep your baby calm, steady, and looking at the camera
- A passport photo service or app to crop and compliance-check your image before printing (more on this in Step 6)
- A printer and photo paper, or an online print service like Walgreens or CVS
That’s it. No ring lights, no backdrops, no professional equipment necessary. After all, the most important ingredient — besides your baby, of course — is patience. Plan for a brief 10 to 15 minute session, choose a time when your baby is rested and has recently eaten, and you’ll be just about set.
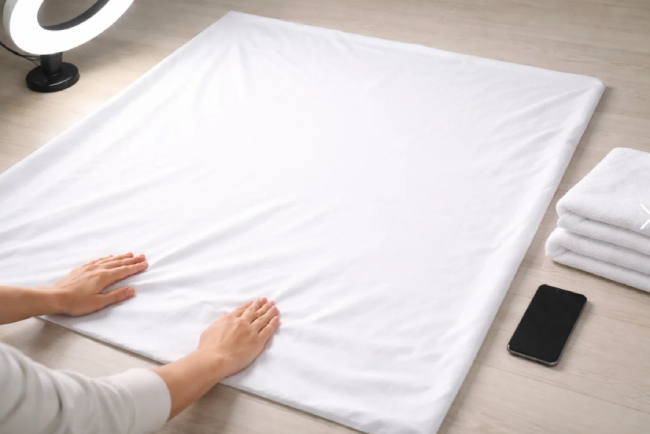
Step 1: Prepare Your Background
The background is what the passport acceptance agent is going to look at first, so spending a little extra time on it is worthwhile. U.S. State Department regulations require a plain white or off-white background with no shadows, patterns, textures, or lines. The good news is that a plain white sheet or blanket is all you need to meet that standard.
The simplest technique for newborns and young infants is to place a white sheet on the floor, bed, or any other firm surface and lay your baby down on it, face up. This works so well because gravity helps hold your baby naturally still and facing upward — right at the camera. For older babies who can sit up or hold their head with help, draping a white sheet over a car seat or bouncy chair makes a clean background.
If you don’t have a white sheet, a white T-shirt stretched over a pillow, a piece of white poster board, or even a white wall will work just as well. The key is that the surface should be evenly light in color with no wrinkles, patterns, or colored images showing through — these fine details are clearly visible in photos and are one of the most common reasons for rejections.
Once you have your background set up, grab a quick test shot and zoom in to check for shadows or texture before you bring the baby into the frame. It’s far simpler to address the problem now than after your session is done.
⚠️ Important: Do not use off-white or cream sheets with faint patterns or embossed details — they may appear plain to the naked eye but can look textured in a photo. Use the whitest fabric you have.
Step 2: Adjust the Lighting
Lighting is the difference between a photo that sails through the application process and one that gets sent back with a rejection notice. The goal is bright but gentle light so that your baby’s face comes through clearly, with natural skin tones and no shadows — neither on the face nor on the background.
A window is the best light source you have. Position your background near a large window and face your baby so that the light is coming toward their face from the front or slightly to one side. Light tends to be softer and more diffused in the late morning and early afternoon. When the sun is shining bright and direct, hang a sheer curtain or tape a white sheet over the window to filter it — this softens the harsh rays and eliminates sharp shadows.
If there is only one window in your room, shadows may fall on the other side of your baby’s face. You can fix this by placing a white piece of foam board or a sheet of white cardboard on that side. It acts as a reflector, bouncing light back onto the shaded side and balancing the exposure without any extra equipment.
The one thing to avoid is your camera’s flash. It may seem helpful in a dim room, but flash creates a strong shadow directly behind your baby’s head — one of the most common technical reasons passport photos are rejected.
💡 Pro Tip: Overcast days are actually ideal for this. A layer of clouds acts like a giant natural diffuser, spreading light evenly across your entire setup with no shadows at all. If possible, plan your photo session for a cloudy day.
Step 3: Correctly Position Your Baby
This is the step that requires the most patience — and usually produces the most outtakes. The State Department requires that your baby face the camera directly, with their full face visible, their head centered in the frame, and no other individuals or hands visible in the photo. That last requirement is what makes this step uniquely challenging for infants who cannot yet support themselves.
For newborns and very young babies, the flat-on-the-back method is the way to go. Place your baby on the white sheet you prepared in Step 1, face up, and position yourself above them with the camera lens pointing straight down. This naturally frames their full face and keeps any adult out of the shot. If needed, place a small rolled towel on each side of their head to keep it from rolling to one side.
For babies who can sit up with a little help, drape your white sheet over a car seat or supportive chair and place your baby in it. Ask your helper to stand just behind the camera to stabilize them and keep them upright. Hold the camera lens straight and level — shooting at an angle up or down can distort the face.
Whichever method you choose, having a second adult is essential. One person manages the baby’s position and attention while the other takes the pictures. To get your baby to look straight at the lens, hold a favorite toy or bright object just above the camera, or play a familiar sound from behind the phone.
For a quick, reliable check to confirm your photo meets all position and sizing requirements before you print, a service such as PhotoGov can examine your image and flag any compliance issues — helping you avoid wasting money on a rejected submission.
💡 Pro Tip: Instead of taking single shots, switch your camera to burst mode or record a 20–30 second video of your baby looking toward the lens. You’ll end up with dozens of frames to choose from, and your chances of capturing that perfect open-eyed, relaxed-expression moment will be much higher.
Step 4: Snap the Photo
With your background prepared, your lighting set, and your baby properly positioned, you’re ready to shoot. A few simple adjustments to your camera habits here can make a real difference in how quickly you get a quality, compliant final image.
Use your phone’s rear camera, not the front-facing selfie camera. The rear camera has a much larger sensor, which produces sharper images and performs significantly better in low light. Passport photos must be crisp and high-resolution — blurry or pixelated images will be rejected — so this small choice matters.
Clean your lens before you start. A dirty phone lens is one of the most common causes of hazy or blurry pictures. Just wipe it down with a soft cloth before the session begins. Also, make sure HDR or portrait mode is disabled — these processing features can alter skin tones and introduce background blur that may be flagged as digital manipulation.
When you’re ready to shoot, take far more photos than you think you’ll need. Twenty to thirty shots is not excessive — it’s smart. You’re looking for a frame where the baby’s eyes are open, their expression is relaxed and neutral, their mouth is mostly closed, both ears are visible, and no hands or props are in the frame. Not every shot will have all of that, and having plenty to choose from is a real advantage in Step 5.
Step 5: Make Sure the Photo Meets Official Standards
Before you crop or print anything, take a few minutes to review your best photos against the official U.S. State Department standards. Catching an issue now costs you nothing — catching one after you’ve already submitted your application costs you time, money, and a rescheduled appointment.
Run through this checklist for your top three or four photos:
- Size: The printed photo must be 2 × 2 inches (51 × 51 mm), and the baby’s head must measure between 1 and 1⅜ inches (25–35 mm) from chin to top of head
- Background: Plain white or off-white, no shadows, no texture, no patterns
- Expression: Neutral and relaxed — not laughing, not crying. A completely neutral expression is not required for babies, but the face should be calm and forward-facing
- Eyes: Open and visible for infants old enough to keep their eyes open; partially open eyes are acceptable for very young infants as long as the face is pointed toward the camera
- Mouth: Closed or at rest — no wide smiles, no pacifiers
- Face orientation: Full face, looking directly at the camera, head centered and not tilted
- What’s in frame: Hands out of frame; no props, toys, glasses, hats, or headbands (except for documented religious or medical reasons)
- Image quality: Sharp and in focus, no visible pixels or motion blur, natural skin tones
- Recency: The photo must have been taken within the last six months
Note for new parents: The State Department recognizes that infant photos present unique challenges. The rules are slightly more lenient for newborns — a relaxed rather than completely neutral mouth position is acceptable, and partially closed eyes on a newborn photo won’t result in an automatic rejection. For up-to-date official information, visit the U.S. State Department photo requirements page at travel.state.gov.
Once you’ve identified your best compliant shot, you can move on to cropping and resizing.
💡 Pro Tip: When in doubt about a photo, trust your gut. If something looks slightly off to you, a passport agent will likely notice it too. Go back to your full batch and look for a cleaner shot before moving on.
Step 6: Crop and Resize Your Photo
Taking a good photo is only half the work. A raw image from your smartphone is almost never the right size or alignment for a passport photo straight out of the camera — it needs to be tightly cropped to 2 × 2 inches with the baby’s head properly centered and sized within the frame. This is where a lot of parents go wrong, and it’s the most common technical reason an otherwise good photo gets rejected.
It’s not worth trying to crop by hand in your phone’s built-in photo app or a generic tool like Photoshop. Without passport photo guidelines built in, it’s nearly impossible to judge by eye whether the head height falls between 1 and 1⅜ inches, whether the face is properly centered, or whether the final output will print at the correct size. A small error at this stage can produce a photo that looks fine on screen but fails inspection in person.
The easiest solution is to use an online passport photo service that automatically applies the correct crop and verifies that the image meets U.S. State Department specifications. PhotoGov is a straightforward option — upload your photo, and the service checks sizing, head position, and background compliance, then provides a print-ready file. That removes the guesswork entirely and gives you confidence that you’re submitting the right photo.
Once your photo has been cropped and validated, you’ll receive a properly sized digital file to use in the next step. Save it somewhere accessible, since you may need a printed copy for an in-person application as well as a digital copy if any part of the process is completed online.
⚠️ Do not resize a passport photo by simply dragging its corners in a standard photo editing app. Incorrect resizing can drop the resolution below the minimum threshold, resulting in a blurry print that will be refused. Use a dedicated passport photo tool only.
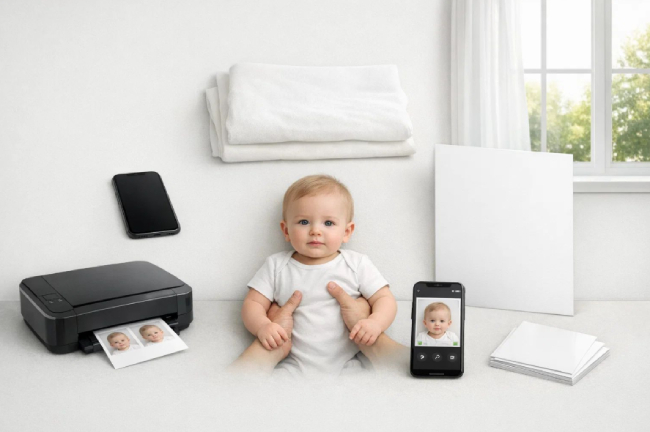
Step 7: Print or Download Your Photo
Your photo has been cropped and checked for compliance — you’re nearly at the finish line. Now you just need to turn the image into a file you can actually submit. Depending on what equipment you have at home and how quickly you need it, you have a couple of good options.
Option 1: Print at Home
Print on 4 × 6 inch glossy or matte photo paper — standard office paper is not acceptable, as the State Department requires photo-quality paper and will reject prints on plain stock. Most passport photo services, including PhotoGov, deliver your cropped image on a 4 × 6 template with two 2 × 2 photos side by side, which is exactly the format acceptance facilities expect. Use your printer’s highest quality setting, allow the ink to dry completely before handling, and store the print flat to avoid creasing.
Option 2: Order Prints Online
If you don’t have a photo printer at home, uploading your 4 × 6 template file to an online printing service is a convenient and affordable alternative. Walgreens, CVS, Walmart, and Costco all offer same-day photo printing for less than a dollar per 4 × 6 print at most locations. Simply upload your formatted file to their website, select the standard 4 × 6 photo print option, and choose in-store pickup. Prints are typically ready within an hour.
A note on digital submissions: If you are renewing a passport through the State Department’s online renewal process, you will upload a digital photo file rather than mailing in a printed copy. In that case, the digital file from Step 6 is all you need — no printing required. However, your baby’s first passport application must be submitted in person, and you will need to bring two printed 2 × 2 inch photos on photo-quality paper.
💡 Pro Tip: Print two copies even if you only think you need one. Minor passport applications require two photos, and having a spare protects you if one gets damaged or lost before your appointment — saving you from having to redo the entire process.
Tips for Getting It Right the First Time
Baby passport photography trips up even the most experienced parents. These tips are practical and realistic, and they’ll help you get as close to perfect as possible before you ever press the shutter.
Time your shoot strategically. Your baby’s mood is the single best predictor of how smoothly this will go. Plan the session for shortly after a nap and a feeding, when your baby is most alert and content. A well-rested, recently fed baby is far less likely to fuss.
Dress your baby in solid, colorful clothing. White or very light-colored clothing can blend into the background and cause compliance issues at the edges of the frame. Choose a simple, solid color in a soft or bright shade. Avoid busy patterns, logos, or text — the focus should be on your baby’s face, not their outfit.
Keep the session short. Babies have limited patience for being repositioned under lights. Aim for 10 to 15 minutes at most. If your baby gets fussy, stop, comfort them, and try again once they’ve settled — you won’t get a usable passport photo from a stressed baby.
Use video as your secret weapon. Instead of frantically tapping the shutter hoping to catch a good moment, record a 20–30 second video of your baby looking toward the camera, then screenshot the best frame. This technique consistently produces more natural expressions and open eyes than shooting in single-shot mode.
Always have a helper. One adult on the camera and one managing the baby isn’t a luxury — it’s a necessity. Your helper can make small adjustments to your baby’s head position, hold their attention with a toy or a sound, and step out of frame a split second before you shoot.
Review your photos on a large screen before you print. What looks sharp and well-lit on a phone screen may turn out to be shadowed, slightly out of focus, or cluttered in the background when viewed on a tablet or computer monitor. Always zoom in and evaluate your best candidates on your largest screen before committing to a crop and print.
FAQs
Can my baby have their eyes closed in the passport photo?
Newborns and very young infants can have their eyes partially closed in the photo. The U.S. State Department allows flexibility on this point for the youngest applicants, recognizing that babies cannot reliably keep their eyes open on demand. The face must still be clearly visible and unobstructed. For older infants who are capable of keeping their eyes open, fully open eyes are expected.
Can I hold my baby while taking the passport photo?
No — this is one of the most important rules to follow. No other person may appear in the shot, including a parent’s hands, arms, or any part of their body. If your infant cannot sit or stand unassisted, the recommended approach is to lay them on a white sheet and shoot from above, or to place them in a car seat draped with a white sheet. Both methods keep your baby safely supported without any adult appearing in the frame.
What if my baby won’t stop crying or smiling?
A crying baby is not going to produce a usable passport photo — and that’s okay. When that happens, end the session, comfort your baby, and try again when they’ve calmed down. A wide, open-mouthed smile is not acceptable either; the State Department requires the mouth to be closed or relaxed. Your best chance is to catch a calm, in-between moment — right after a smile fades, or during those quiet seconds after your baby has been soothed. As mentioned in Step 4, burst mode and video recording are great tools for capturing these brief windows of opportunity.
Can I get a newborn passport photo at the hospital?
Technically yes, but in practice it’s rarely worth the effort. Newborns in their first day or two tend to be asleep, swaddled in blankets, and surrounded by equipment — making it very difficult to capture a compliant white-background photo. Most parents find it much easier to wait until they’re home and able to set up a proper background and lighting. There is no requirement to take the photo within a certain number of days of birth — it simply needs to have been taken no more than six months before you submit the passport application.
Do I need a printed photo, or can I submit a digital file?
For a minor’s first-time passport application — which must be submitted in person at a passport acceptance facility — you are required to bring two printed 2 × 2 inch photos on photo-quality paper. A digital file alone is not sufficient for in-person applications. However, if you are renewing through the State Department’s online passport renewal system, you will upload a digital photo instead of mailing a print. Make sure you know which process applies to you before deciding whether to print or keep only a digital copy.
Conclusion
Taking a baby passport photo at home is one of those tasks that sounds daunting until you actually do it. With a good background, natural light, a willing helper, and a bit of patience, most parents end up with a perfectly acceptable photo after one short session — no studio, no appointment, no unnecessary stress.
These instructions walk you through every step, from setting up the shot to printing a photo that’s ready to submit. Follow them in order and you’ll avoid the most common reasons passport photos get rejected.
The one step that genuinely benefits from a dedicated tool is Step 6 — cropping and compliance checking. Guessing at a 2 × 2 inch crop on your phone screen is where most well-intentioned efforts go wrong. For a fast, hassle-free experience, PhotoGov lets you upload your photo and receive a compliance-checked, print-ready file in minutes — so you can focus on the really fun part: deciding where that little passport is going to take your family.
Safe travels.