 I watched a supermarket car park in Auckland grind to a halt one Friday afternoon. Faded arrows, missing give-way lines, and a near-invisible pedestrian crossing turned a simple exit into a ten-minute jam.
The next weekend, fresh paint and new signage were in place. The difference was immediate, drivers flowed, and people stopped second-guessing each other.
Use the standards and checks below to set bay sizes, protect pedestrians, meet accessibility obligations, and plan a repaint without shutting the site down.
Key Takeaways
Clear layouts reduce conflict, speed up parking, and make compliance checks far less stressful.
- Marking quality affects incident risk and throughput. Bright lines and bold symbols remove hesitation at the exact points where crashes happen.
- Accessibility requirements come from NZS 4121 and Building Code D1 guidance. Counts, slopes, and routes are the common audit tripwires.
- Headroom, lighting, and symbol conventions matter as much as bay paint. A “correct” space fails if it’s dark, blocked, or hard to reach.
- One-way aisles and direct pedestrian routes cut decision points. Fewer choices usually means fewer near-misses.
- Maintenance beats major rework. Quarterly checks and fast touch-ups extend the life of a full repaint.
What Good Looks Like In A New Zealand Car Park
A strong layout balances safety, flow, and compliance, and it does all three at once.
Safety separates people from vehicles with visible walkways and crossings. Flow relies on intuitive wayfinding with consistent arrows and priorities. Compliance means aligning with NZS 4121, relevant AS/NZS 2890 references, and local council expectations.
Safety First: Design To Prevent Incidents
Design for predictable behavior, because predictability is what prevents bumps and near-misses.
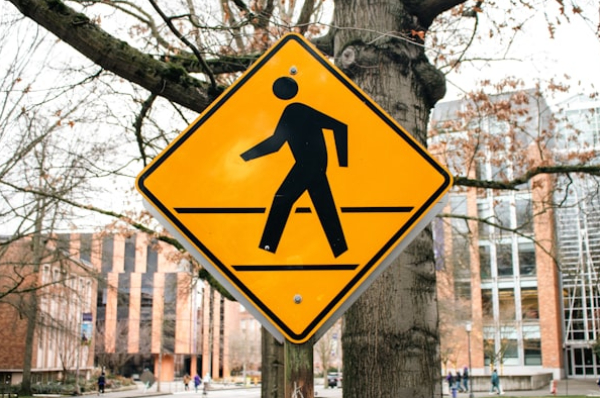
Separate People And Vehicles
Mark continuous pedestrian routes from parking areas to entrances, not a “best guess” path across traffic. Put zebra crossings at aisle intersections where drivers already slow to turn.
Under the Health and Safety at Work Act 2015, a Person Conducting a Business or Undertaking (PCBU) must manage risks so far as reasonably practicable. WorkSafe traffic management guidance supports dedicated routes, clear sightlines, and highly visible markings. For a broader look at how modern tools support workplace safety, see this guide on ways technology can help improve worker safety.
Control Speed And Improve Sightlines
Paint speed-limit roundels near entries and at long internal straights, not just by the exit. Keep corners open by hatching “no standing” areas where parked cars would block visibility.
Make Night Use Obvious
Use high-contrast legends and add glass beads for retroreflectivity, meaning the line reflects light back toward headlights. Waka Kotahi pedestrian guidance points to lighting approaches aligned with AS/NZS 1158.3.1 for pedestrian areas, which matters for retail, education, and health sites operating after dark.
Compliance Essentials In New Zealand
If you want fewer redesign loops, start with the standards reviewers check first.
Accessible Bay Numbers And Placement
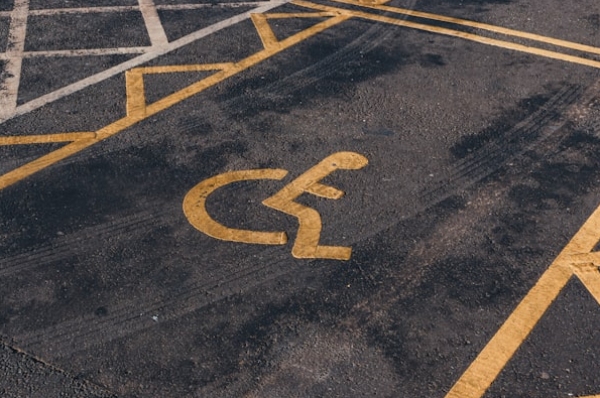
NZS 4121:2001 requires at least 1 accessible space for 1 to 20 total parks, at least 2 for 21 to 50, then 1 more for each additional 50 parks. Put them on the shortest accessible route to the main entrance, supported by compliant kerb ramps and an uninterrupted path.
Mark the space with the wheelchair symbol and use consistent, high-contrast colour conventions, including yellow where required by site policy or local guidance.
Dimensions That Pass Plan Review
Many councils reference typical on-site bays around 2.4 m wide by 5.4 m long, with around 300 mm side clearance. For accessible spaces, D1/AS1 recognises a 3.2 m width, with an extra 300 mm where an adjacent obstruction limits door opening.
Also check slope, because paint can’t fix geometry. A common expectation for accessible spaces is a maximum slope of 1:50 on a firm, slip-resistant surface.
Headroom, Lighting, And Symbols
Provide about 2.5 m clearance above accessible spaces and along the internal driveways serving them. Other spaces in buildings are often designed around a 2.2 m minimum, but confirm against the building’s use and posted restrictions.
Keep the International Symbol of Access uncluttered, strongly contrasted, and repeated where drivers choose lanes, not only inside the bay.
Enforcement And Real-World Consequences
From October 2024, parking in a mobility space without a valid permit carries a $750 infringement fee across New Zealand. If your signs or lines are unclear, you create disputes and make legitimate enforcement harder.
Flow And User Experience
Good flow reduces hesitation, and hesitation is what creates queues and small collisions.
Use one-way aisles with clear arrows where you can, because they simplify turning and sightlines. Keep pay stations, barriers, and intercoms away from the entry throat so queues don’t back into the public road.
Place EV charging, loading, and parent-with-pram spaces close to entrances but out of the main circulation line. Put time limits and icons on both pavement and posts so drivers see them from any angle.
What To Paint: The Essential Checklist
A repaint works best when you treat it like a system, not a quick cosmetic fix.
- Standard spaces, accessible spaces with shared access aisles, and EV spaces
- Loading zones, pedestrian walkways, and zebra crossings
- Give-way and stop lines at internal junctions
- Directional arrows, speed roundels, and hatch markings for no-standing areas
- Fire egress keep-clear zones, bay numbers, and clear legends for reserved areas
- Kerb ramp alignment checks, bollards near glazing or doors, and wheel stops only where they protect walkways or walls
Materials And Durability
Match the coating to the surface, the traffic, and how quickly you need to reopen.
Waterborne acrylic is budget-friendly and dries quickly on asphalt. Two-part epoxy holds up on concrete and high-wear areas like ramps and crossings. Thermoplastic lasts longer and can include reflectivity, but it costs more and needs specialist application.
DIY Vs Professional: What Is Worth Doing Yourself?
DIY can work for small, low-risk updates, but compliance-critical work is rarely worth gambling on.
| Task | DIY Feasible? | Risk if Wrong | When to Hire
|
|---|---|---|---|
| Small touch-ups and bay numbers | Yes, with quality stencils | Low | If fading is widespread |
| Arrow and legend repaints | Sometimes | Medium | If junctions are complex or visibility is poor |
| Accessible space layout and symbols | No | High, audit failure | Always |
| Full site repaint with traffic management | No | High, safety and compliance | Always |
For larger or mixed-user sites, the main risk with DIY is not the paint itself but the decisions behind it: bay counts, accessible routes, traffic priority, and how you stage closures without creating new hazards. A contractor who does this work daily can audit the existing layout, map upgrades against NZS 4121 and council expectations, and provide documentation your tenants and inspectors can actually use. If you want a fast, compliant refresh, talk to Total Line Marking about car park marking to audit, design, and repaint to current NZ guidance.
Step-By-Step: A 10-Day Refresh Plan
Phasing the work keeps access open while still delivering a clean, consistent result.
- Days 1 to 2: Audit bay counts, obstructions, gradients, headroom, lighting, and pedestrian routes.
- Day 3: Draft the layout with conformance notes, then review with H and S, facilities, and tenants.
- Days 4 to 5: Prep the surface, including wash, degrease, crack fill, and removal of loose paint.
- Days 6 to 7: Paint phase one, focusing on aisles, priorities, and standard bays while keeping half the site open.
- Day 8: Paint phase two, focusing on crossings, walkways, legends, and symbols.
- Day 9: Quality checks, including contrast, symbol clarity, sign alignment, and ramp continuity.
- Day 10: Handover the as-built plan, product data sheets, and a maintenance calendar for audits.
Maintenance That Keeps Lines Readable
Maintenance works when it’s simple enough to actually happen.
Run a quarterly walk-through and record wear on crossings, arrows, and high-turn zones. Touch up failures early, because partial refreshes cost far less than restarting the whole layout.
Before winter, do a full-site check: pressure-wash grime, reapply beads or repaint dull lines, and fix lighting outages. Treat resurfacing, building works, and tenant changes as triggers for a layout review.
Cost, Downtime, And ROI
Costs rise with poor surface condition, high symbol counts, complex staging, and premium coatings.
Downtime drops when you phase the job, use rapid-cure products, and communicate closures early. The payback usually shows up as fewer incidents, fewer complaints, and fewer rushed repaint jobs after a close call.
Conclusion
Fresh paint only helps when it supports a layout that people understand at a glance.
Start with a site audit, fix the highest-risk conflict points, and phase the work to keep access open. Then lock in a simple maintenance rhythm so the layout stays clear long after the first repaint.
FAQ
These answers cover the practical questions site managers ask before they commit to a refresh.
How often should a busy NZ site be repainted?
High-traffic areas like supermarket lots and hospital entrances often need a full repaint every 12 to 18 months. Quarterly touch-ups on crossings, arrows, and legends help you stretch that cycle.
Do I need wheel stops in every space?
No. Use wheel stops where vehicles could overhang a pedestrian route, garden edge, or wall. In open lots, they can create trip hazards, so place them sparingly and keep them high-contrast.
What makes an accessible bay fail an audit?
Common failures include incorrect dimensions, slopes steeper than 1:50, faded symbols, missing access aisles, blocked kerb ramps, and inadequate headroom in parking buildings. Any one issue can trigger a non-compliance notice.
How do I protect pedestrians without causing constant queues?
Run marked walkways parallel to aisles instead of forcing people through moving traffic. Put zebra crossings at natural slow points like aisle ends and entry throats, then reinforce them with speed roundels or raised platforms where needed.