The System Restore utility included with the latest versions of Microsoft Windows is one of the most wonderful tools Windows users have at their disposal. It works somewhat like a time machine, allowing you to restore your Windows installation and software back to the state they were in at any point in time at which a Restore Point was created. If you make a change to your system that renders it unbootable or if a virus or other problem causes issues with Windows performing the way it should, a System Restore can almost always save the day.
If System Restore is turned on, the system creates Restore Points automatically from time to time. Restore Points are also created before updates are installed or other major changes are made to your Windows installation. What’s more, you can create a Restore Point manually should you feel the need to do so for any reason.
How to manually create a Restore Point
1 – Click “Start” and then type System Restore into the search box. Press the Enter key.
2 – Click “Create a Restore Point”.
3 – Click “Create”.
4 – Type a description for the Restore Point you’re about to create. Something like “Before installing new video card” will suffice.
5 – Click “Create”.
How to restore your computer to an earlier time
1 – Click “Start”.
2 – Click “Control Panel”.
3 – Click “System and Security”.
4 – Click ” Restore your computer to an earlier time”.
5 – Click “Open System Restore”.
6 – Click “Next”.
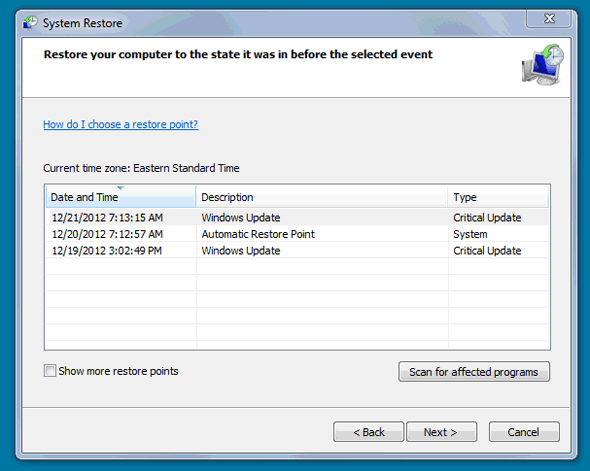
7 – Select a Restore Point from the list, then click “Next” and follow the prompts on the screens that follow.
Restoring your system when Windows won’t start up
If Windows won’t boot up normally, you’ll have to run System Restore after booting Windows into Safe Mode. Click here for step-by-step instructions for booting into Safe Mode.
If Windows won’t even boot into Safe Mode you’ll have to start the System Restore utility manually. Here’s how:
1 – Follow the instructions for booting into Safe Mode but select “Safe Mode with Command Prompt” from the menu.
2 – At the command prompt type rstrui.exe and then press the Enter key. At this point you might be prompted for an admistrator password.
3 – Follow the instructions on the screens that follow for selecting a Restore Point and initiating the restore process.
Important: It’s absolutely imperative that you not turn off the computer while a System Restoreis in progress. It’s also imperative that the computer doesn’t lose power. This is one of the many reasons why you should have your computer plugged into a battery backup unit.